LiveEditor Test
基本用法
div {
border: 1px solid gray;
}
let container = document.getElementsByTagName('div')[0];
let div = document.createElement('div');
div.textContent = 'ccc';
container.appendChild(div);
CSS Grid
Game Title
Score
Stats
Board
Controls
div.container {
display: grid;
grid-template-columns: auto 1fr;
grid-template-rows: auto 1fr auto;
background: repeating-linear-gradient(45deg, #333333 0, #333333 5%, #4f4f4f 0, #4f4f4f 50%) 0 / 10px 10px;
}
#title {grid-column: 1; grid-row: 1;}
#score {grid-column: 1; grid-row: 3;}
#stats {grid-column: 1; grid-row: 2; align-self: start;}
#board {grid-column: 2; grid-row: 1 / span 2;}
#controls {grid-column: 2; grid-row: 3; justify-self: center;}
div.container div {
border: 1px solid gray;
padding: 0.5em;
background-color: #333;
}
console.log('Hello');
取消默认的CSS设置
默认的CSS设置了以下的样式:
html, body {
margin: 0;
padding: 0;
}
body {
color: #ACB7C4;
background-color: #2B2B2B;
}
若想取消以上默认设置,可加上一个no-default-style的属性:
...
这避免了在每个实例组件中通过更详细的语法来覆盖原有样式,客户端使用更加方便。
支持自定义CSS
观察上面的CSS
标签页,里面并无任何内容,但运行后,发现边框、字体颜色及间距均有设置。LiveEdtor可通过result-default-css属性支持自定义的CSS设置。
...
这样,当我们需要为多个LiveEditor设置相同的CSS样式时,与其每次都在CSS
标签页中重复设置,不如将这些相同的设置放在一个外部的CSS文件中,然后通过设置LiveEditor的result-default-css属性即可达到目的。
从外部文件中提取各标签页的内容
以下是一个独立的文件src.html:
<!DOCTYPE html>
<html>
<head>
<title>Src</title>
<meta charset="UTF-8">
<meta name="viewport" content="width=device-width, initial-scale=1.0">
<style>
canvas {
border: 1px solid gray;
}
</style>
<script>
let canvas = document.querySelector('canvas');
let ctx = canvas.getContext('2d');
ctx.strokeStyle = 'yellow';
ctx.strokeRect(0, 0, 50, 50);
</script>
</head>
<body>
<canvas></canvas>
<p>The element above is a canvas.</p>
</body>
</html>
将上面的文件相应部分都分别提取出来放置至LiveEditor中:
效果:
这功能很酷,一是无需手工编写额外的代码,二是避免了不同步的问题,三是将一个可直接运行的网页文件立即转换为LiveEditor,可用于调试及演示的目的。
定制JavaScript代码
如果同一页面下的多个LiveEditor都用到同样的一段JavaScript代码,与其各自重复编写这样的代码,不如将其分离出来。共有2种方式。
第一种方法是通过创建一个CJS
(common JavaScript)标签,将这些辅助性的JavaScript代码放在其中:
showMsg();
function showMsg() {
console.log('Hello');
}
在运行时,放在CJS
标签中的代码可被JS
标签中的代码访问。
showMsg();
function showMsg() {
console.log('Hello');
}
上面,在CJS
标签中声明了一个名为showMsg的函数,而JS
标签中的代码直接予以调用。
而如果CJS
标签中的代码很长,则可通过第二种方式,为cjs-file属性指定一个外部JavaScript文件。
showMsg();
showMsg();
将调用者的相对路径转换为绝对路径
如果某个CSS文件中引用了相对路径的URL:
#aDiv::after {
content: url("./images/sun.svg");
...
}
LiveEditor是全局共享的,在其路径下肯定没有此图像文件。因此需要将上面相对于LiveEditor的相对路径转换为调用者的绝对路径。
LiveEditor的applyCSSFromTab方法对此进行了转换:
async applyCSSFromTab(doc, cssContent) {
cssContent = cssContent.replaceAll(/(url\(")(.+)("\))/g, (match, p1, p2, p3) => {
let newURL = new URL(p2, window.location);
return p1 + newURL.pathname + p3;
});
...
}
借用window的location,创建一个绝对路径的URL,再调用String的有回调函数版本的replaceAll方法,便捷地进行了转换。
下面以相对路径方法指定一个背景图像:
div {
width: 100px;
aspect-ratio: 1/1;
border: 1px solid gray;
background-image: url("../../../../imgs/note.png");
}
钩子方法
为支持子类的灵活配置,LiveEditor有7个钩子方法。
doOnSetupDivs(ctrlDiv, resultDiv, consoleDiv) {
}
doAfterRunClicked(iframe) {
}
doAfterApplyHTMLFromTab(doc) {
}
doBeforeApplyJSFromTab(doc, resultDiv) {
return '';
}
doOnSetupIframeTemplateSrc(iframe) {
return '/js/esm/web-widgets/live-editor/iframe-template.html';
}
doOnImportJSModule() {
return '';
}
doOnModifyCM6Content(title, contentStr) {
return undefined;
}
后面的4个方法需返回特定值。
子类可覆盖这些方法,以根据特定的需求进行进一步的设置,如调整相应div的高度、设置自己的iframe模板,等等。
打开隐藏的Console面板
Console面板默认情况下是隐藏的。但可通过设置is-show-console属性值来显示该面板。
...
效果:
console.log('Hello World!');
指定输出面板的高度
result-div-height属性值用于设定输出面板的高度。
...
效果:
div.container {
display: grid;
place-content: center;
height: 100vh;
}
p {
font-size: 2em;
}
由上可见,当我们自行手工指定高度值时,我们需要自行计算输出区域的高度,效果才佳。
可设置自动高度:
...
效果:
body {
display: grid;
place-content: center;
/* min-height: 100vh; */
}
p {
margin: 0.5em;
font-size: 2em;
}
This is a paragraph.
And another paragraph.
当子标签设置了margin属性值时,父容器若需设置高度,应使用可伸缩的min-height,而不是固定的height,否则将失去自动调整高度的功能。此时,最方便的莫过于父容器干脆不设置高度值。
而当网页内容中有img等标签时,输出面板的确切高度只有等待图像加载完毕后才能确定。目前,LiverEditor可自动监控网页内容是否有img,若有,当所有图像加载完毕后,自动更新输出面板的高度。
#wrapper {
border: 0px solid #336633;
}
@media (prefers-color-scheme: dark) {
img {
filter: invert(100%);
}
}
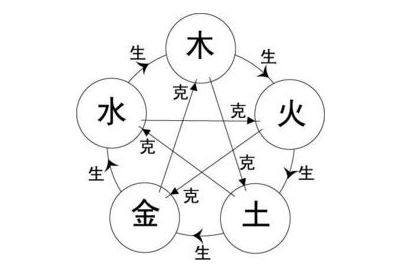
八卦中以五行生克来定吉凶。五行生克可以很简单,但蕴涵了许多朴素而深奥的哲学原理。
这个功能省心省力。
使用PageConsole
给live-editor添加一个use-pageconsole的属性:
<live-editor use-pageconsole>
...
</live-editor>
则可在live-editor中直接使用PageConsole。
const {clientWidth, clientHeight} = document.querySelector('div');
pc.log('clientWidth: %d', clientWidth);
pc.log('clientHeight: %d', clientHeight);
PageConsole将在输出面板的最下面,以折叠的方式输出信息。
如果希望将PageConsole的输出区域以内联的方式放在某一元素的右边,则为其设置一个use-pageconsole-inline的属性:
<live-editor use-pageconsole-inline>
...
</live-editor>
效果:
canvas {
border: 1px solid gray;
}
let canvas = document.querySelector('canvas');
canvas.style.width = '300px';
canvas.style.height = '300px';
canvas.width = canvas.clientWidth * devicePixelRatio;
canvas.height = canvas.clientHeight * devicePixelRatio;
let ctx = canvas.getContext('2d');
ctx.scale(devicePixelRatio, devicePixelRatio);
ctx.font = '48px Helvetica';
ctx.strokeStyle = 'WHITE';
ctx.strokeText('Hello', 50, 70);
ctx.fillStyle = 'DEEPSKYBLUE';
ctx.fillText('Canvas', 100, 130);
pc.log('canvas clientWidth: %d', canvas.clientWidth);
pc.log('canvas clientHeight: %d', canvas.clientHeight);
pc.log('canvas width: %d', canvas.width);
pc.log('canvas height: %d', canvas.height);
pc.log('Some texts');
pc.log('Some texts');
pc.log('Some texts');
pc.log('Some texts');
pc.log('Some texts');
pc.log('Some texts');
pc.log('Some texts');
pc.log('Some texts');
pc.log('Some texts');
pc.log('Some texts');
pc.log('Some texts');
pc.log('Some texts');
pc.log('Some texts');
pc.log('Some texts');
pc.log('Some texts');
pc.log('Some texts');
PageConsole将自动占满右边的弹性空间,且当内容溢出时,自动出现滚动条。
